Monday, April 21, 2014

Kabocha Squash Chili with Poblanos

What to do with a 5 pound Kabocha squash that will make for fast food dinners over the next couple nights? I decided to steam about half of it and make a chili style meal, bake the other half to use either for a salad or for a spicy puree.  This is how the chili went together, for eating on rice (or rice noodles!).

Kabocha Squash Chili with Poblano Pepper

2.5 lbs Kabocha squash (1/2 of a medium sized one) cut in wedges and steamed
3 stalks celery sliced in thin slices and chopped
4 cloves garlic, smashed and chopped
6-8 frozen plum tomatoes
1 medium large onion chopped
1 poblano pepper chopped medium fine
2 Tblsp chopped fresh cilantro (at least)
3/4 cup chopped greens - I used beet greens
1 tsp each cumin, ginger, paprika, thyme
.5 tsp red pepper flakes
2 tsp (at least) chili powder
1 can dark red kidney beans (or fresh cooked, or any other bean you like)
.5-1 tsp salt
2 tsp Bragg's Liquid Amino


Chop up everything else and put all the other ingredients into a medium large pot. (I used the same one that I used to steam the squash to keep my clean up to a minimum.)

Once the squash has cooled enough, cut off the peeling and the dark green part so that it is all tender flesh. Kabocha has a kind of chestnut-like quality that is crumbly, so cut it into fairly good sized rectangular chunks that won't just dissolve in the chili.

Let this cook on a simmer for 20 minutes uncovered. Stirring occasionally. ADD SQUASH and let simmer another 20 minutes. You can keep for a couple days in the fridge -- or eat the same day! It's great on any kind of rice, and also on thin rice noodles -- or soba!!  We ate this on kasha and sprinkled lightly salted peanuts on top, which was great for a textural combination.


Saturday, April 19, 2014

Roasted veggies with seasoned tofu

We are straddling two seasons as the root veggies start softening up, storage onions start sprouting greens and the fresh asparagus begins arriving from just a little south of us. For me, a meal is especially pleasing that has qualities of warmth and coolness, color and texture. This meal met all those aspects plus it came together simply. I steamed fresh asparagus in the last 10 minutes that the food in the oven was uncovered, and the kale salad softened the whole time the veggies roasted. I have to admit that my husband and I ate nearly all of this in one dinner, but adding an additional beet, sweet potato and a couple onions (or parsnips) this could feed 4 people! You can also double the tofu.

Roasted Veggies (bakes 1 hour)
Set oven to 350F

3 beets
2 carrots
1 sweet potato 
4 cippolini onions
teaspoon Herbes de Provence
1/2 tsp pepper
1/2 tsp salt (or to taste)
tsp olive oil optional

Scrub, peel and cut into medium, similar sized pieces. Place on tin foil in a baking pan - I prefer cast iron enamel to distribute the heat, but use what you have. Sprinkle the herbs, salt, pepper and oil (if you are using any), cover with another sheet of foil and place in oven. Set the timer for 40 minutes.

Kale salad
Use one good sized bunch of any kale you like - choosing moderate sized tender leaves.  We like curly and lacinato especially for this. Tear the leaf off the stem and tear into reasonabe edible pieces - not longer than your fingers or wider than your hand. Wash and spin dry. Place leaves in a fairly large bowl ( they do compact but start out needing space). In a separate bowl, mix together the dressing:
 1/2 c tarragon vinegar,
 1-2 Tblspn of a second vinegar like pomegranate or balsamic, 
add 2 cloves finely chopped garlic 
about 1/2 tsp salt. 
Smooth this dressing into the kale leaves, gently bruising the leaves and rubbing around to spread the dressing into all the pieces. Refrigerate while everything else cooks - smooshing  the leaves once more 10 minutes before serving (just about when you take the foil off the veggies).

Seasoned tofu

Cut a block of firm tofu into 6 short thick slices. Set out a bowl to soak them in. In a second bowl mix the mustard marinade:
1.5 Tblspn spicy mustard (your favorite)
1tsp Braggs Liquid Amino
1tsp tamari 
1/2 tsp ume plum vinegar
2tsp maple syrup
1Tblspn chili sauce (you could use ketchup with a little horseradish and vinegar added)
A shake of sriracha sauce
Pour this over the tofu and stir gently to cover all the surfaces.
After a few minutes, tip the bowl and recoat the surfaces with the sauce. Then add:
5 chopped shiitake mushrooms
2 chopped scallions
Let this sit, stir once or twice.

When the timer goes off, take the foil off the veggies, stir them gently and push them towards the edges if the pan. Put the seasoned tofu mixture into the center of the pan, spreading it so the tofu doesn't overlap too much. Cover with the foil and set the timer for 10 minutes.

When the timer goes off, take the covering off the baking pan and set the timer for the last 10 minutes. Steam the asparagus in that 19 minutes.

Enjoy!

Banana Oat Cookiies

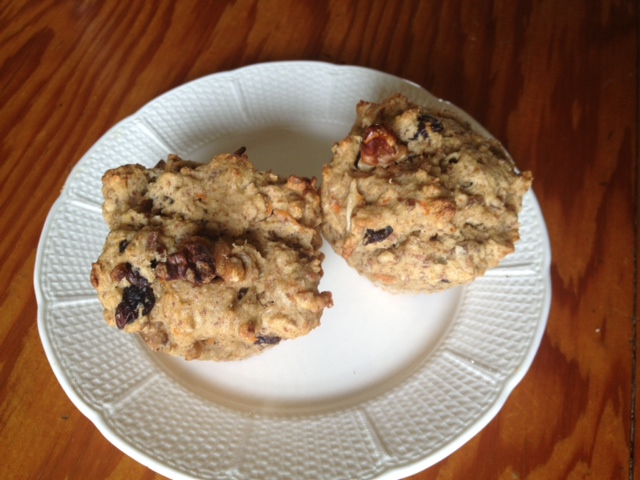
As usual, my agenda began with an ingredient that required attention: 3 small overripe bananas. So I mashed them in a bowl, added oats and off I went. These are cheating a little on my usual strategy by using some dark brown sugar, but only 2 tablespoons. We ate these for breakfast, but my husband said, "Call them cookies, they'd be good anytime!" So I did.

Banana Oat Cookies

Mix together and let sit 
3 small overripe bananas mashed, or 2 large ones
1.5-2 cups whole oats 
1/2-2/3 cup almond milk (unsweetened plain) enough to make a mush, not liquidy
1 heaping tsp chia seeds

In a larger bowl mix:
1/2 c chick pea flour
2/3 c brown rice flour
1/4 c millet flour
1Tblspn tapioca starch
1 heaping tsp baking powder
1/2 tsp baking soda
1-2 tsp cinnamon (as you like it)
2 Tblspn dark brown sugar
2 Tblspn nutritional yeast

Combine moist ingredients into dry stirring til consistent, and toss in your favorite dry fruits/nuts. I used what I had on hand which ended up being about 1/2 c mixed raisins and cranberries plus 1/2 c walnuts.

Set oven at 375F and spoon out heaping tablespoon sized blobs onto a silicone baking sheet at least an inch space between them.

Bake 25 minutes (check 'em at 20 minutes). The house will smell great when they're done!

Friday, April 18, 2014

Sourdough Millet Breadsticks: Struggling with sourdough

Last winter I bought a book all about gluten free bread baking. I read the reviews (very positive) and made the corrections from the errata related to oven temperatures and times. I bought all the expensive specific ingredients. I nurtured the sourdough starter and tried the yeast breads. Basically 3 out of 10 recipes were pleasant to eat and none were worth posting here or serving to anyone else. Sigh. 

So I went back to inventing my own misadventures in gluten free vegan bread baking. Except for the fact that I felt terrible discarding the sourdough starter, even though it had failed me. It smells so good and has so much Teff in it... 

Today's experiment centered around using the weekly discard from that starter. I have to reduce it by half and add new Teff and water so it can continue to grow (if that's what it's doing). So I made bread sticks using the rest of the millet flour that didn't fit in the quart jar I use for fridge storage, some sorghum flour, a splash of Xanthan gum (because I bought it for all those  failed bread recipes) a couple teaspoons of yeast, a tablespoon of molasses, well... It came out nicely and was a fun accompaniment to the corn chowder I thawed out for lunch.  Here's the way it went. The sourdough starter must be made at least 4 days in advance.

Sourdough Millet Teff Breadsticks

Sourdough starter:
4 cups ground Teff flour
Red cabbage outer leaf 
2-3 apple peeling pieces 
4-5 cups room temp filtered water
Large mixing bowl

Mix together 2 cups water 2 cups flour and the cabbage leaf, torn into 2 pieces, and the apple peelings in a good sized bowl. Leave this out on the kitchen counter or other moderately warm place where you will see it. Cover it with cheesecloth or a dish towel (especially in summer to keep bugs out if it) and stir it gently every 4-6 hours. Add 1/2 cup Teff flour and 1/2 cup water every 12 hours for at least 2 days. 

After 48 hours you should be seeing bubbles and smell some fermentation. Take out 1 cup and add in 1/2 cup Teff and 1/2 cup water. Let stand another 6 -12 hours. If you are going to use some right away , you can take 1 cup out and feed the starter again. Give it at least 4 hours and then refrigerate it in a closed jar. Every week you need to take out a cup & feed it, setting it out to give it time to restart the growth. You can experiment with adding other flour like millet, sorghum etc.

Breadsticks

1.5 cup starter
1/2. cup Teff flour
1 1/4 cup millet flour
2/3 cup sorghum flour
1 tsp Xantgan gum (binder to replace gluten)
2tsp yeast
1 Tblspn molasses
1/2 -2/3 cup water to moisten
Mix all these stirring gently until thoroughly moistened and combined.

1Tblspn garlic powder
5-8 kalamata olives cut off the pit in bits
1.2 tsp dried (or fresh!) rosemRy crushed or chopped
1/2 tsp sea sat


Stir in all the above and let sit covered with a cloth for 40-50 minutes.

Sprinkle a surface with 1/4 c millet flour.
Take a fistful of dough and dredge just enough so you can roll it out on a non stick Silicone baking sheet on a large cookie sheet. They can be 5-7 inches long and best is a little wider than an inch. Makes about 8 sticks. After you've used up all the dough, sprinkle kosher salt and ground pepper in another handful of millet flour in the flat surface. Gently pick up each stick and dab and roll it in the salt/pepper replacing it on the baking sheet with the peppery side up. Make 3 quick diagonal cuts in the surface of each stick.

Bake for 30-40 minutes at 375F checking for doneness afyer 30 minutes. 


Monday, November 25, 2013

Sour Cherry Scones

These little morsels are satisfying, just sweet enough, packed with nutrition, and easy to make if you have a good supply of this and that in the kitchen. You could replace the dried sour cherries with something else, like cut up dried apricots, or even raisins or pieces of dates. The dried sour cherries add an element of depth and character that a totally sweet thing doesn't. In fact, dried blueberries might be another good example of that sweet-tart layering in a scone. I decided to try something totally new and use coconut water (the less sweet type, about 7g sugar in 8 ounces) for liquid, since there was already some protein from the chickpea flour etc. Nice omega 3's from the chia, plenty of good stuff here, and tasty! I also used a bit of jam to finish up a jar in the fridge... and you can do that too with any flavor you have around, or just add a bit more sweetness with honey or maple syrup or some form of sugar if you use it.

Sour Cherry Scones (makes 6)
pre-heat oven to 375F

1/4 cup golden flaxmeal (or grind your own flaxseeds)
1/4 cup potato starch
1/4 cup chick pea flour (I wonder if ground quinoa would work here? maybe next time)
1/2 cup brown rice flour
1 tsp baking powder
1 TBLS chia seeds
1/4 tsp salt
1/2 tsp lemon zest

1-2 TBLS jam of your choice
1 tsp vanilla
1/2 cup coconut water (NOT MILK)

1-2 TBLS dried sour cherries
1/2 cup walnuts

Mix all the dry ingredients (1st 7on the list) plus the lemon zest.
Mix jam, vanilla and coconut water in a small bowl.
Add wet to dry, mixing sparingly.
Toss in the dried cherries and crunch up the walnuts into the size bits you like to find in your scones.  Mix this all together until it is consistently textured, but don't overdo it.

Plop extra large tablespoon ovals onto a non-stick silicone baking sheet, on a cookie sheet or other pan. Allow 35-40 minutes for baking but set your timer for 25 minutes and test for doneness, being ready to put them back in for up to 10 more minutes.

They will begin to brown and crisp a bit on the outer edges, but remain a little moist inside. These are scones -- not muffins -- and go well with marmalade, honey, or nut butters.

Saturday, November 9, 2013

Oat Bran Muffins, with fresh & dried fruits

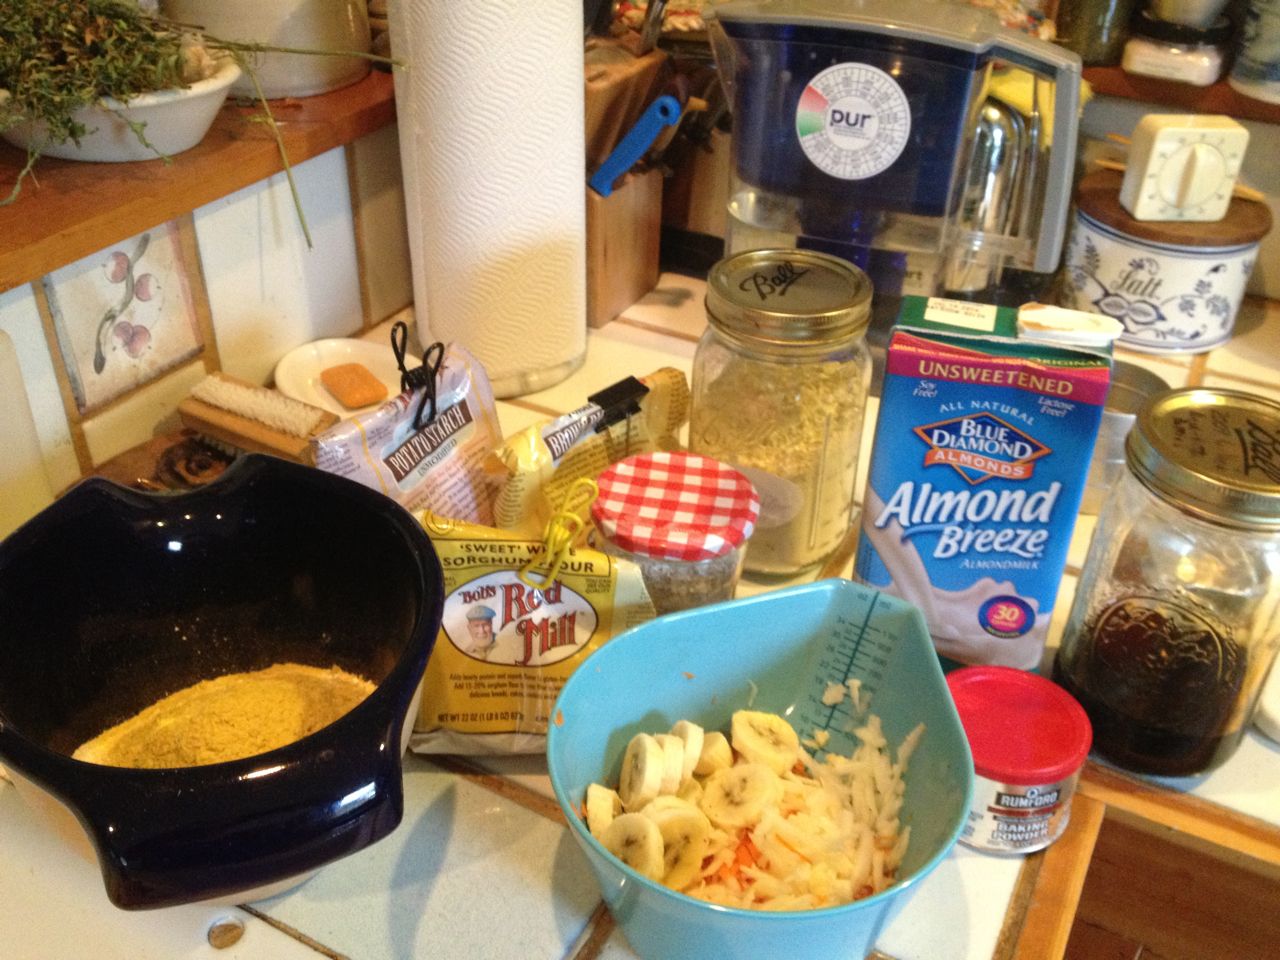
Our first prolonged snow flurries decorated the fallen apple leaves when I got up this morning, calling out for morning muffins. I had one ripe banana and decided to try oat bran muffins, with flecks of carrot for color, crunch of walnuts, sweetness of raisins and freshly grated apple. With a little help from maple syrup and apple jelly syrup (a failed jelly experiment that has been great for baking), these were even sweet enough for my husband to eat them without the usual dab of honey. If you use no oil, like I do, you will need silicone non-stick muffin cups. The combination of chick pea, brown rice, oat bran, flax and all makes for a nutritious vegan muffin without trading away anything at all in the way of texture or flavor or satisfaction.


OAT BRAN MUFFINS WITH FRESH & DRIED FRUITS

1/4 cup chick pea flour
1/4 cup brown rice four
1/4 cup potato starch
1/3 cup oat bran
1/2 cup sorghum flour
2 TBSP ground flax seed
1 TBSP nutritional yeast
1 tsp baking powder
1/4 tsp sea salt
1 TBSP maple syrup
1 TBSP apple jelly syrup (or use more maple syrup)
1/2 cup almond milk
1 mashed ripe banana
1 grated carrot
1 grated (peeled/seeded) apple
1/4 cup raisins
1/4 cup walnuts

Preheat oven to 400F.  (You will turn this down after a few minutes of baking.)

Mix all the dry ingredients (first 9 on the list).
Mix all the wet ingredients (the next 6), leaving the raisins and walnuts out for now.
Stir the wet into the dry, making sure you moisten all the dry into a thick spongy texture.
Now stir in the raisins and walnuts, saving out 7-8 walnut pieces to stick one in the top of each muffin.

Using a big spoon (serving spoon or tablespoon) put large blobs of batter into each non-stick silicone muffin cup, sticking a walnut piece into the top for crisping and decoration. Place these on a baking sheet and put into oven for 5-10 minutes SET THE TIMER!!  TURN DOWN THE OVEN TO 350F and BAKE for another 20-25 minutes until a toothpick comes out clean. Cool a few minutes before popping out of the silicone cups -- cool a few more before eating. ENJOY THEM WARM. They can be quite moist inside from the banana... but ought to taste fully baked, not undercooked. That crisped walnut adds an important element!

Spaghetti Squash with Anytime Fresh Tomato Sauce


The bowl on our early November table has two pale tomatoes waiting to turn into something resembling summer tomatoes. The farm markets continue to offer beautiful cool weather greens and winter squash in every variety. So the dinner plan formed around a round lovely spaghetti squash, and my husband suggested that a fresh tomato sauce would be lovely. "Fresh tomato sauce?" I thought looking at him sideways.  Then I remembered my strategy at summer's end -- I had thrown piles of ripe plum tomatoes into plastic freezer bags and plopped them into the freezer. I use these in soups and chili and they taste as fresh as summer. As soon as the cold tomato hits the heat of the broth or whatever, the peelings pop right off, leaving just the succulence of the tomato. Of course they turn to mush -- but isn't that what we want in a sauce? So this evolved into another instant favorite -- sweet spaghetti squash well saturated with fresh tomato, garlic, slivered kale leaves and herbes de Provence. Oooh la la! This is a beautiful dish that takes less than an hour to make fresh.


SPAGHETTI SQUASH WITH ANYTIME FRESH TOMATO SAUCE

1 medium large spaghetti squash
6-10 cloves fresh garlic roughly chopped
8 or so fresh-frozen plum tomatoes (you could use a can I suppose)
5-8 medium kale leaves, destemmed
1/2-3/4 c water
1/2 - 1 tsp salt (your taste...)
1 TBLSP herbes de Provence
Freshly ground pepper
Sesame seed gomasio (if you want to imitate a finishing sprinkle on top)

FIRST BAKE THE SQUASH:
Heat the oven to 350F. Cut the spaghetti squash in half length-wise (from stem to end). Open the squash and scrape out the seeds and seed goop with a large strong tablespoon. Place the squash halves on a baking sheet covered with tin foil and leave in the oven for about 30 minutes, or until you can press into the peeling side and it feels soft.  This is just the right amount of time for making the sauce.

MAKE THE SAUCE:
Plop the frozen tomatoes into a sauce/stew pot with roughly chopped garlic and the water and salt. You can start with less salt and always add more as it simmers, or on the table.  Cover and heat a few minutes, turning the tomatoes once or twice so that you can pick up each tomato and squeeze off the peelings. Then add the kale, cut into slivers. I wad the leaves up on a cutting board and cut thin slices through the wadded leaves. This is not a precise science. Stir in the kale with the herbes de Provence, a bit more salt, and let this simmer covered for at least half an hour.

JOINING SQUASH AND SAUCE:
When the sauce has simmered for at least 15-20 minutes, take the squash halves out of the oven, turn them over carefully. Let them cool a little (5 minutes at least), then hold one half in one hand with a well protected hand (using an oven mit is a good technique), while scraping out the squash flesh into a large bowl. Break up the squash flesh into its spaghetti like strands with a fork. Do both halves.

Pour the sauce over the squash in the bowl and serve. People can fish down into the bowl to pull the squash out, with the beautiful layer of sauce all over the top (and the juiciest part of the sauce filtering down into the bowl through the squash).  Serve with a choice of fresh pepper grinder, sea salt, and sesame seed gomasio as possible at-table finishing touches.

Note: You can roast these squash seeds if you like. Clean off the debris, rinse them, sprinkle them with Tamari, layer them on a baking sheet and let them crisp up, turning with a spatula at least once in about 15 minutes.