Monday, November 25, 2013

Sour Cherry Scones

These little morsels are satisfying, just sweet enough, packed with nutrition, and easy to make if you have a good supply of this and that in the kitchen. You could replace the dried sour cherries with something else, like cut up dried apricots, or even raisins or pieces of dates. The dried sour cherries add an element of depth and character that a totally sweet thing doesn't. In fact, dried blueberries might be another good example of that sweet-tart layering in a scone. I decided to try something totally new and use coconut water (the less sweet type, about 7g sugar in 8 ounces) for liquid, since there was already some protein from the chickpea flour etc. Nice omega 3's from the chia, plenty of good stuff here, and tasty! I also used a bit of jam to finish up a jar in the fridge... and you can do that too with any flavor you have around, or just add a bit more sweetness with honey or maple syrup or some form of sugar if you use it.

Sour Cherry Scones (makes 6)
pre-heat oven to 375F

1/4 cup golden flaxmeal (or grind your own flaxseeds)
1/4 cup potato starch
1/4 cup chick pea flour (I wonder if ground quinoa would work here? maybe next time)
1/2 cup brown rice flour
1 tsp baking powder
1 TBLS chia seeds
1/4 tsp salt
1/2 tsp lemon zest

1-2 TBLS jam of your choice
1 tsp vanilla
1/2 cup coconut water (NOT MILK)

1-2 TBLS dried sour cherries
1/2 cup walnuts

Mix all the dry ingredients (1st 7on the list) plus the lemon zest.
Mix jam, vanilla and coconut water in a small bowl.
Add wet to dry, mixing sparingly.
Toss in the dried cherries and crunch up the walnuts into the size bits you like to find in your scones.  Mix this all together until it is consistently textured, but don't overdo it.

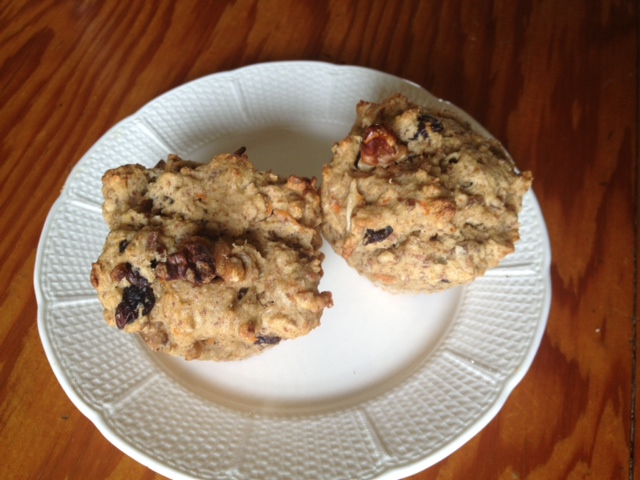
Plop extra large tablespoon ovals onto a non-stick silicone baking sheet, on a cookie sheet or other pan. Allow 35-40 minutes for baking but set your timer for 25 minutes and test for doneness, being ready to put them back in for up to 10 more minutes.

They will begin to brown and crisp a bit on the outer edges, but remain a little moist inside. These are scones -- not muffins -- and go well with marmalade, honey, or nut butters.

Saturday, November 9, 2013

Oat Bran Muffins, with fresh & dried fruits

Our first prolonged snow flurries decorated the fallen apple leaves when I got up this morning, calling out for morning muffins. I had one ripe banana and decided to try oat bran muffins, with flecks of carrot for color, crunch of walnuts, sweetness of raisins and freshly grated apple. With a little help from maple syrup and apple jelly syrup (a failed jelly experiment that has been great for baking), these were even sweet enough for my husband to eat them without the usual dab of honey. If you use no oil, like I do, you will need silicone non-stick muffin cups. The combination of chick pea, brown rice, oat bran, flax and all makes for a nutritious vegan muffin without trading away anything at all in the way of texture or flavor or satisfaction.


OAT BRAN MUFFINS WITH FRESH & DRIED FRUITS

1/4 cup chick pea flour
1/4 cup brown rice four
1/4 cup potato starch
1/3 cup oat bran
1/2 cup sorghum flour
2 TBSP ground flax seed
1 TBSP nutritional yeast
1 tsp baking powder
1/4 tsp sea salt
1 TBSP maple syrup
1 TBSP apple jelly syrup (or use more maple syrup)
1/2 cup almond milk
1 mashed ripe banana
1 grated carrot
1 grated (peeled/seeded) apple
1/4 cup raisins
1/4 cup walnuts

Preheat oven to 400F.  (You will turn this down after a few minutes of baking.)

Mix all the dry ingredients (first 9 on the list).
Mix all the wet ingredients (the next 6), leaving the raisins and walnuts out for now.
Stir the wet into the dry, making sure you moisten all the dry into a thick spongy texture.
Now stir in the raisins and walnuts, saving out 7-8 walnut pieces to stick one in the top of each muffin.

Using a big spoon (serving spoon or tablespoon) put large blobs of batter into each non-stick silicone muffin cup, sticking a walnut piece into the top for crisping and decoration. Place these on a baking sheet and put into oven for 5-10 minutes SET THE TIMER!!  TURN DOWN THE OVEN TO 350F and BAKE for another 20-25 minutes until a toothpick comes out clean. Cool a few minutes before popping out of the silicone cups -- cool a few more before eating. ENJOY THEM WARM. They can be quite moist inside from the banana... but ought to taste fully baked, not undercooked. That crisped walnut adds an important element!

Spaghetti Squash with Anytime Fresh Tomato Sauce


The bowl on our early November table has two pale tomatoes waiting to turn into something resembling summer tomatoes. The farm markets continue to offer beautiful cool weather greens and winter squash in every variety. So the dinner plan formed around a round lovely spaghetti squash, and my husband suggested that a fresh tomato sauce would be lovely. "Fresh tomato sauce?" I thought looking at him sideways.  Then I remembered my strategy at summer's end -- I had thrown piles of ripe plum tomatoes into plastic freezer bags and plopped them into the freezer. I use these in soups and chili and they taste as fresh as summer. As soon as the cold tomato hits the heat of the broth or whatever, the peelings pop right off, leaving just the succulence of the tomato. Of course they turn to mush -- but isn't that what we want in a sauce? So this evolved into another instant favorite -- sweet spaghetti squash well saturated with fresh tomato, garlic, slivered kale leaves and herbes de Provence. Oooh la la! This is a beautiful dish that takes less than an hour to make fresh.


SPAGHETTI SQUASH WITH ANYTIME FRESH TOMATO SAUCE

1 medium large spaghetti squash
6-10 cloves fresh garlic roughly chopped
8 or so fresh-frozen plum tomatoes (you could use a can I suppose)
5-8 medium kale leaves, destemmed
1/2-3/4 c water
1/2 - 1 tsp salt (your taste...)
1 TBLSP herbes de Provence
Freshly ground pepper
Sesame seed gomasio (if you want to imitate a finishing sprinkle on top)

FIRST BAKE THE SQUASH:
Heat the oven to 350F. Cut the spaghetti squash in half length-wise (from stem to end). Open the squash and scrape out the seeds and seed goop with a large strong tablespoon. Place the squash halves on a baking sheet covered with tin foil and leave in the oven for about 30 minutes, or until you can press into the peeling side and it feels soft.  This is just the right amount of time for making the sauce.

MAKE THE SAUCE:
Plop the frozen tomatoes into a sauce/stew pot with roughly chopped garlic and the water and salt. You can start with less salt and always add more as it simmers, or on the table.  Cover and heat a few minutes, turning the tomatoes once or twice so that you can pick up each tomato and squeeze off the peelings. Then add the kale, cut into slivers. I wad the leaves up on a cutting board and cut thin slices through the wadded leaves. This is not a precise science. Stir in the kale with the herbes de Provence, a bit more salt, and let this simmer covered for at least half an hour.

JOINING SQUASH AND SAUCE:
When the sauce has simmered for at least 15-20 minutes, take the squash halves out of the oven, turn them over carefully. Let them cool a little (5 minutes at least), then hold one half in one hand with a well protected hand (using an oven mit is a good technique), while scraping out the squash flesh into a large bowl. Break up the squash flesh into its spaghetti like strands with a fork. Do both halves.

Pour the sauce over the squash in the bowl and serve. People can fish down into the bowl to pull the squash out, with the beautiful layer of sauce all over the top (and the juiciest part of the sauce filtering down into the bowl through the squash).  Serve with a choice of fresh pepper grinder, sea salt, and sesame seed gomasio as possible at-table finishing touches.

Note: You can roast these squash seeds if you like. Clean off the debris, rinse them, sprinkle them with Tamari, layer them on a baking sheet and let them crisp up, turning with a spatula at least once in about 15 minutes.

Brussels Sprouts with mustard sauce

Lately my husband has been enamored with mustard. There is a tang and a depth added to a dish with just the right amount of mustard in addition to the usual ingredients. Yes, there are patterns and habits in making vegan meals every day, and mustard quite simply adds a bit of spice to life! So when I was planning a fairly common combination of brussels sprouts, onion and mushrooms as a major side dish, I chose to add a stone ground mustard to the Bragg Liquid Amino, water and dash of black pepper. It was well worth it, and turned this one-pan dish into an instant favorite.


BRUSSELS SPROUTS WITH MUSTARD SAUCE

2 torpedo (or other pungent red) onions
10-12 medium button mushrooms
2-3 cups or 1.5 pounds Brussels sprouts
2 tsp Bragg Liquid Amino
2 TBLSP stone ground mustard of your choice
1/2 c water
dash freshly ground black pepper

Slice the onions in thin slices, separating the rings in the bottom of a wide non-stick pan.
Clean the Brussels sprouts (cut off the tough stem ends and peel away any yucky leaves, washing off any dirt), and slice them in half vertically - cutting through from the stem end through the floret.
Brush the mushrooms and cut in quarters if large enough, or in half if smaller (use more of them if they are small).

Layer the Brussels Sprouts over the onion layer, putting the mushrooms on top. Pour 1/2 c water, Bragg's, and mustard over all of this and cover with lid. Simmer for about 10-15 minutes, stirring once or twice. Then turn off and leave covered, allowing the Brussels sprouts to steam and soften further, while not overcooking the mushrooms.

You can serve just like this, or cook a couple minutes without the lid to further reduce the mustard sauce onto the veggies.